Update on Lyme disease: Is it bug-check season in your area of the United States?

lyme rash photo

The classic bullseye rash of Lyme

Our infectious disease colleagues warn us that this year, winter in the Northeast United States was not cold enough for long enough to kill off as many ticks as usual. Thus, we folks in Pennsylvania are in for a more burdensome Lyme disease season. We’ve already had children come to our office this spring with concerns of tick bites, so here’s an update on Lyme disease:

Lyme disease is spread to people by blacklegged ticks. Take heart- even in areas where a high percentage of blacklegged ticks carry the bacteria that causes Lyme disease, the risk of getting Lyme from any one infected tick is low. Niney-nine percent of the little critters DON’T carry Lyme disease… but there are an awful lot of ticks out there. Blacklegged ticks are tiny and easy to miss on ourselves and our kids. In the spring, the ticks are in a baby stage (nymph) and can be as small as a poppy seed or sesame seed. In order to spread disease, the tick has to be attached and feeding on human blood for more than 36 hours, and engorged.

In areas in the United States where Lyme disease is prevalent (New England and Mid-Atlantic states, upper Midwest states such as Minnesota and Wisconsin, and California), parents should be vigilant about searching their children’s bodies daily for ticks and for the rash of early Lyme disease. Tick bites, and therefore the rash as well, especially like to show up on the head, in belt lines, groins, and armpits, but can occur anywhere. When my kids were young, I showered them daily in summer time not just to wash off pool water, sunscreen, and dirt, but also for the opportunity to check them for ticks and rashes. Now that they are older I call through the bathroom door periodically when they shower: “Remember to check for ticks!” Read our post on how to remove ticks from your kids.

“I thought that Lyme is spread by deer ticks and deer are all over my yard.” Nope, it’s not just Bambi that the ticks love. Actually, there are two main types of blacklegged ticks, Ioxdes Scapularis and Ioxdes Pacificus, which both carry Lyme and feed not only on deer, but on small animals such as mice. (Fun fact: Ioxdes Scapularis is known as a deer tick or a bear tick.)

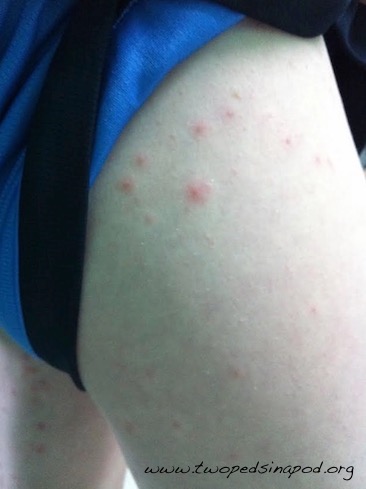
Most kids get the classic rash of Lyme disease at the site of a tick bite. The rash most commonly occurs by 1-2 weeks after the tick bite and is round, flat, and red or pink. It can have some central clearing. The rash typically does not itch or hurt. The key is that the rash expands to more than 5 cm, and can become quite large as seen in the above photo. This finding is helpful because if you think you are seeing a rash of Lyme disease on your child, you can safely wait a few days before bringing your child to the pediatrician because the rash will continue to grow. The Lyme disease rash does not come and then fade in the same day, and the small (a few millimeters) red bump that forms at the tick site within a day of removing a tick is not the Lyme disease rash. Knowing that a rash has been enlarging over a few days helps us diagnose the disease. Some kids have fever, headache, or muscle aches at the same time that the rash appears.

If your child has primary Lyme disease (enlarging red round rash), the diagnosis is made by a doctor examining your child. Your child does not need blood work because it takes several weeks for a person’s body to make antibodies to the disease, and blood work tests for antibodies against Lyme disease, not actual disease germs. In other words, the test can be negative (normal) when a child does in fact have early Lyme disease.

The second phase of Lyme disease occurs if it is not treated in the primary phase. It occurs about one month from the time of tick bite. Children develop a rash that looks like the primary rash but appears in multiple body sites all at once, not just at the site of the tick bite. Each circular lesion of rash looks like the primary rash but typically is smaller. Additional symptoms include fever, body aches, headaches, and fatigue without other viral symptoms such as sore throat, runny nose, and cough. Some kids get the fever but no rash. Some kids get one-sided facial weakness. This stage is called Early Disseminated disease and is treated similarly to the way that Early Lyme disease is treated- with a few weeks of antibiotics.

The treatment of early Lyme disease is straightforward. The child takes 2-3 weeks of an antibiotic that is known to treat Lyme disease effectively such as amoxicillin or doxycycline. Your pediatrician needs to see the rash to make the diagnosis. This treatment prevents later complications of the disease. While the disease can progress if no treatment is undertaken, fortunately children do not get “chronic Lyme disease.” Once treatment is started, the rash fades over several days. Sometimes at the beginning of treatment the child experiences chills, aches, or fever for a day or two. This reaction is normal but you should contact your child’s doctor if it persists for longer.

Later stages of Lyme disease may be treated with the same oral antibiotic as for early Lyme but for 3-4 weeks instead of 2-3 weeks. The most common symptom of late stage Lyme disease is arthritis (red, swollen, mildly painful joint) of a large joint such as a knee, hip, or shoulder. Some kids just develop joint swelling without pain and the arthritis can come and go.

For some manifestations, IV antibiotics are used. The longest course of treatment is 4 weeks for any stage. Children do not develop “chronic Lyme” disease. If symptoms persist despite adequate treatment, sometimes one more course of antibiotics is prescribed, but if symptoms continue, the diagnosis should be questioned. No advantage is shown by longer treatments. Some adults have lingering symptoms of fatigue and aches years after treatment for Lyme disease. While the cause of the symptoms is not understood, we do know that prolonged courses of antibiotics do not affect symptoms.

For kids eight years old or older, if a blacklegged tick has been attached for well over 36 hours and is clearly engorged, and if you live in an area of high rates of Lyme disease-carrying ticks, your pediatrician may in some instances choose to prescribe a one time dose of the antibiotic doxycycline to prevent Lyme disease. The study that this strategy was based on and a few other criteria that are considered in this situation are described here.* Your pediatrician can discuss the pros and cons of this treatment.

Bug checks and insect repellent. Protect kids with DEET containing insect repellents. The Centers for Disease Control recommends 10 to 30 percent DEET- higher percent stays on longer. Spray on clothing and exposed areas and do not apply to babies under two months of age. Grab your kids and preform daily bug checks- in particular look in crevices where ticks like to hide such as the groin, armpits, between the toes and check the hair. Be suspicious of random scabs. Dr. Lai once had a elementary school patient who had a blacklegged tick in the middle of his forehead. The mother noticed it at breakfast, tried to brush it off, thought it was a scab and sent the boy to school. Later that day the teacher called saying, “I think your son has a bug on his face.”

Misinformation about this disease abounds, and self proclaimed “Lyme disease experts” play into people’s fears. While pediatricians who practice in Lyme disease endemic areas are usually well versed in Lyme disease, if you feel that you need another opinion about your child’s Lyme disease, the “expert” that you could consult would be a pediatric infectious disease specialist.

For a more detailed discussion of Lyme disease, look to the Center for Disease Control website: www.cdc.gov.

Julie Kardos, MD and Naline Lai, MD

©2016 Two Peds in a Pod®, updated from our original post in 2009

*link corrected 4/18/2016


image_pdfimage_print
Share

Rolling along: Teach your child to ride a bike

how to ride a bike

Helmets on, ready to roll
photo credit: Sylvia Aptacy pixabay

About 95 percent of all Americans know how to ride a bike and who taught them? Probably their parents. Joining us today is frequent guest blogger Dr. Deb Stack with pointers on teaching your kid how to ride. – Drs. Lai and Kardos

I live in beautiful Bucks County, PA, an area known for its rolling hills, bike paths and covered bridges. With spring here, it’s a great time to head out for a family ride.

Yet with less outdoor playtime, more and more children are struggling with learning to ride. A child’s readiness is very individual. My own children ranged in age from 6-11 years old when they learned. Interestingly, my oldest learned by hopping on a friend’s bike and being pushed down a gentle, grassy hill by the neighborhood children while I huddled out of sight around the corner. It turns out, their technique was right.

Riding a bike is an interplay of several components:

  1. INTEREST – if the child is not interested, it is not time to try.
  2. ABILITY to maintain PEDALing at a walking speed at least, even with distraction.
  3. ABILITY to BALANCE when sitting.
  4. STEERING
  5. STARTING and STOPPING

After making sure your child is interested, check the bike:

The seat should be low enough that the rider can place both feet flat on the ground at the same time.

If there are hand brakes, the brake to the front wheel should be disconnected. This will prevent the rider from accidently squeezing only the front brake and being sent over the handlebars.

Remove the pedals or practice balancing on a Skuut bike, or balance bike, (two-wheeler without pedals). These are readily available and not too costly, but tend to be needed for only a short time.

Mountain bikes or BMX style bikes are not recommended for learning. Look for a bike where the pedals are nearly directly under the seat and the child does not have to raise the knees too high at the top of the pedal cycle.

Wear a helmet and make sure it is securely fastened under the chin.

Location: Look for a gently sloping grass hill (the kids were right!) or a large, fairly level, empty parking lot

What to do:

    1. Practice pedaling separately if possible. Try a trike or stationary bike and practice pedaling at a steady rate and even singing or carrying on a conversation without stopping before heading out to try a two-wheeler.
    2. Practice balancing: Use both feet to push off the ground and glide forward as far as the rider is able. Have the rider place feet down if he feels uncomfortable and then push again. Practice for about 15-20’. Keep practicing, trying to decrease the number of pushes per overall distance. Make sure the rider is looking ahead. Everyone, but most especially children, relies heavily on vision to balance.
    3. Practice balancing and using hand brakes (if equipped). Work on glide-squeeze-feet down. This will allow the rider to slow down using the brakes and then place the feet down to stop or remain upright once stopped. It also allows the child to be in control of the speed.
    4. Add the pedals back to the bike. Practice gliding. This time trying to place feet on the pedals for the glide. At this point, it can be helpful for the rider to start by being pushed by a spotter. Getting started and getting feet on the pedals is the most difficult part of riding and should be the last step taught.
    5. Teach the rider how to start. Either pushing two to three times with both feet and placing on pedals, or with one foot while keeping the other on the pedal both work. Children will quickly let you know their preference.
    6. Keep practicing in a large, open space and go in large circles before trying to make sharper turns. Make sure to practice going in circles both to the left AND the right to practice both types of turns. Once the child has good control, you can transition to wide bike paths.

Some helpful reminders:

To keep a bike upright, the rider must lean into the turn, or in other words, turn handles into a fall rather than away.

Training wheels often teach the children to lean the wrong way and often slow learning. Better not to start them!

If you want to use a handle to attach to the back of the bike, make sure it is the type that clamps onto the seat post or frame. Your hand should hover over the top of the handle and just tap it gently to help a child rebalance; don’t hold on. You can use an open hand on the end of the handle to push the child to start.

If your child is not quite ready, you can still enjoy a family ride; tag-along bikes foster good bike habits and let you bring along a child who is not quite ready to go solo. Don’t miss the beautiful spring. Head out and ride!

Deborah Stack, PhD

©2016 Two Peds in a Pod®

With over 20 years of experience as a physical therapist, Dr. Stack heads The Pediatric Therapy Center of Bucks County in Pennsylvania. She holds both masters and doctoral degrees in physical therapy from Thomas Jefferson University.

image_pdfimage_print
Share

How to take your toddler to a restaurant without an iPad

take your toddler to a restaurant and have funHave you wondered if you could take a toddler to a restaurant and have a good time without relying on an iPad for entertainment? This is absolutely possible as long as you have the right expectations, a sense of humor, and a desire to build family memories. In the “old” days when our kids were toddlers, there were no iPads or smart phones so we thought we’d share some ideas to keep your toddler engaged in a restaurant.

Before we go further, understand this: when you go to a restaurant with your toddler(s), you are “going out to eat,” NOT “going dining.” Always have the back-up plan that at any time, if needed, you will convert the entire meal to “take out” status. As long as you accept this backup plan, you are set.

Choose the restaurant wisely. You do not have to eat junk food or “fast” food. Many restaurants with really yummy and nutritious cooking can work for families with toddlers. An important feature to look for: the restaurant offers high chairs or booster seats. If it does, you can infer that the restaurant is “toddler friendly.” Without this attribute, attempt to eat at this restaurant at your own risk and don’t say we didn’t warn you! In addition, find out if the service is fast or slow. Even some “family friendly” restaurants have slow service- this is asking for trouble. Avoid these establishments.

Set the stage. Teach your children how to behave in a restaurant. Play restaurant in your house. Practice “Yes, please” and “No, thank you.” Tell them how they will get to make a choice of what to eat and unlike at home, to try a variety of foods at one meal if you all order something different.

Have reasonable expectations: Research the menu beforehand to make sure you will find something on it that your toddler will eat. Alternatively, just bring your own toddler meal with you and take it out once your own food arrives. Or bring toddler “hors d’oeuvres” that will not spoil his appetite but can be used in emergency if the service is slower than you expected. Examples are thinly sliced apples, portable fruit cup packed in juice, or a stash of low-sugar cereal such as Cheerios® to hand out very slowly.

If the wait staff is young, they probably are not familiar with toddlers and may not understand that waiting is difficult for young children. Ask for your check to come with your food. Consider skipping appetizers so that everyone’s food comes out all at once. Usually toddlers are not happy waiting for food while their parents munch on arugula.

Focus all of your attention on your children. Going to a restaurant with toddlers is not date night, it is family night.

Help your toddler be successful at waiting for the meal to be served or at waiting for everyone to finish eating. Bring along one or two (not the library!) favorite books that either your toddler likes to flip through or likes you to read to her. Bring some paper and crayons – many “family friendly” restaurants supply these but it’s always better to be prepared. My oldest was always entertained with a small matchbox car. We could draw roads for the car on paper or he would just drive the car along the table edge or chair – anything can become a road.

Play games such as “I Spy” with your toddler to pass time while you wait to order or wait for your food. “Where is the man wearing a hat? Where is the picture of the fish?” Talk about the restaurant. Point out where the kitchen is. Point out the food servers: “They write down what we want to eat. They bring us our food!” Point out the bus crew “See, they are cleaning up!” Count the tables. Count how many babies are in the restaurant.

Convert items on the table into make-shift toys. Developmentally toddlers love putting things into other things. Put the pretty pink sugar packet and the white packet into a cup. Dump them out, and do it again. A paper placemat can be scrunched into a ball to roll around. And with a little paper folding, you can make a cootie catcher for pinching little noses. Also, there’s nothing more fun than touching ice sliding around a plate.

We do not recommend walking around the restaurant while waiting to be served because of the potential danger of crashing into a waiter or waitress. Certainly one parent can walk outside with a toddler and the remaining parent can call/text when the food comes. BUT remember, if you are in the habit of all sitting down for at least one meal a day at home, it will be natural for all of you to sit together in a restaurant, and a luxury for the parent who does the most jumping up and down during a home-served meal.

Restaurants are not only for dinner! While my twins did not eat out much as toddlers (hassle factor outweighed the fun factor), we did note that they ate the most food willingly over the longest period of time at breakfast. So we occasionally went to a local deli for Very Early Weekend Breakfast where they could feast slowly on enormous delicious pancakes and my husband and I could enjoy some coffee while it was actually still hot. Bonus: we even could talk to each other because of the concentration my twins paid to picking up every piece of pancake on their own.

Help clean up, and give generous tips. You want to endear yourself to the restaurant staff. It’s great when the wait staff WANTS to serve you when you return (“Oh, it’s that great family with the really cute toddler who loves my Elmo impersonation, says “thank you” when I bring her extra saltines, AND they tip well. That’s MY table!”).

Build your toddler’s self-esteem: Praise your toddler for eating calmly, for sitting without yelling, for his patience: “Good job waiting for your food to come!” As soon as your toddler is done eating and running out of entertaining things to do while sitting at the table, the meal is over! Try to end on a positive note.

Finally, if you end up with a toddler tantrum, just remember the back-up plan. Don’t kill the meal for the rest of the diners in the restaurant. Just pick up your melted-down toddler, convert to take-out, and try again another time. Rome wasn’t built in a day, and sometimes it takes a few tries of eating out with your toddler before you actually all have fun. Fortunately, God/Nature makes toddlers cute even when they are crying and covered in tomato sauce!

Julie Kardos, MD and Naline Lai, MD

©2016 Two Peds in a Pod®

image_pdfimage_print
Share

Test anxiety: taking out the stress

test anxiety

Spelling test on Friday? Algebra unit test next week? SATs looming? Our guest blogger, child psychologist Dr. Jessica Collins, gives tips for calming test anxiety.

Test anxiety is a common source of stress for both students and parents. Despite your best efforts to help your child study more effectively, instructing your child how and what to study may actually increase their anxiety as your suggestions are likely to be based on your own study style preferences. Instead of offering your advice or opinion, we suggest you try some of the following:

Breathe. Help your child relax by practicing diaphragmatic breathing. Diaphragmatic breathing increases oxygen in the bloodstream. It is a way to interrupt the body’s response to stress and promote a relaxation response instead. This strategy can be used before, after and DURING test taking!

Relax. When you are feeling anxious or stressed, one of the ways your body responds is with muscle tension. Progressive Muscle Relaxation (PMR) is a strategy that helps relieve that tension by completing a series of exercises in which you tense your muscles as you breathe in and relax them as you breathe out. PMR can also be used, anytime and anywhere!*

Promote Organization. Before your child begins to study, ensure that he/she has all of the necessary materials (i.e., pens, highlighters, note cards, books). Help your child group his/her study information into categories or test subjects. Organizing information before your child begins to study will allow him/her to spend more time with his/her nose in the books and less time searching for missing papers.

Break It Down. Work backward and help your child identify smaller content areas, within a test subject that he/she can focus on, one at a time. This will help your child feel less overwhelmed and make studying more manageable.

Encourage Time Management. Once your child has organized and identified the test content areas, help your child create a study schedule. Make sure to start studying early. Information is more easily remembered when it is studied for shorter periods of time over a longer time period rather than spending hours cramming for 1 or 2 days. Also, make sure to schedule in study breaks.

State-Dependent Learning. As much as possible, the environment in which your child studies should mimic the test environment. Help your child find a quiet place to study in your home or at the library. Have him/her sit at a desk or table instead of lying on his/her bed. Limit distractions including background noise or music. Use a timer and offer periodic breaks if your child’s testing environment will be doing the same.

Remember the Bigger Picture. Children who experience test anxiety may easily forget how much the test grade counts towards a final grade. Help your child put the test into perspective by highlighting their successes in other areas and how those achievements are linked to future goals. For tests which are used to help determine a child’s future academic placement (e.g., SATs, ACTs, AP exams, etc.), make a list of ALL the other criteria (i.e., letters of recommendation, grades, extracurricular activities) that are also incorporated into applications. The longer the list, the easier it will be for your child to see his/her test score as one factor, out of many, that are used in this decision making process.

It is very common for students to become nervous or anxious when they must take quizzes and tests. By developing effective study skills and engaging in routine practice of relaxation exercises, many child are able conquer test-anxiety.

Jessica Collins, Psy. D.

Dr. Jessica Collins is a licensed PA psychologist. She earned her degree from La Salle University. She completed both her internship and fellowship at the Kennedy Krieger Institute and Johns Hopkins School of Medicine in Baltimore, MD, where she specialized in Pediatric Psychology. 

  • NOTE: original link to a script to Progressive Muscle Relaxation script is broken, here is one your Two Peds found.
image_pdfimage_print
Share

Digging out splinters

splinter

It’s a sure sign of spring. Recently a mom showed me a splinter in her child’s finger (pictured above) from running about outside and falling on wood chips.

If a splinter is very tiny (too small to grab with tweezers,) seems near the skin surface, and does not cause much discomfort, simply soak the splinter in warm soapy water several times a day for a few days. Fifteen minutes, twice a day for four days, works for most splinters. Our bodies in general dislike foreign invaders and try to evict them. Water will help draw out splinters by loosening up the skin holding the splinter. This method works well particularly for multiple hair-like splinters such as the ones obtained from sliding down an obstacle course rope. Oil-based salves such as butter will not help pull out splinters. However, an over-the-counter hydrocortisone cream will help calm irritation and a benzocaine-based cream (for kids over 2 years of age) will help with pain relief.

If the splinter is “grab-able”, gently wash the area with soap and water and pat dry. Don’t soak an area with a “grab-able” wooden splinter for too long because the wood will soften and break apart. Next, wash your own hands and clean a pair of tweezers with rubbing alcohol. Then, grab hold of the splinter and with the tweezers pull smoothly. Take care to avoid breaking the splinter before it comes out.

If the splinter breaks or if you cannot easily grab the end because it does not protrude from the skin, you can sterilize a sewing needle by first boiling it for one minute and then cleaning with rubbing alcohol. With the needle, pick away at the skin area directly above the splinter. Use a magnifying glass if you have to, make sure you have good lighting, and for those middle-age parents like us, grab those reading glasses. Be careful not to go too deep, you will cause bleeding which makes visualization impossible. Continue to separate the skin until you can gently nudge the splinter out with the needle or grab it with your tweezers.

Since any break in the skin is a potential source of infection, after you remove the splinter, wash the wound well with soap and water. Flush the area with running water to remove any dirt that remains in the wound. See our post on wound care for further details on how to prevent infection. If the splinter is particularly dirty or deep, make sure your child’s tetanus shot is up to date. Also, watch for signs of infection over the next few days: redness, pain at the site, or thick discharge from the wound are all reasons to take your child to his doctor for evaluation.

Some splinters are just too difficult for parents to remove. If you are not comfortable removing it yourself of if your child can’t stay still for the extraction procedure, head over to your child’s doctor for removal.

Now you can add “surgeon” to your growing list of parental hats.

Julie Kardos, MD with Naline Lai, MD
©2012 , rev 2016 Two Peds in a Pod®

image_pdfimage_print
Share

Why is my baby’s head flat? About plagiocephaly.

flatheadSqueezed through the birth canal, many babies are born with pointy, cone-shaped heads. Others, delivered by caesarian section, start off life with round heads. Few babies begin with a flat head. But as parents put babies on their backs to sleep in accordance with Sudden Infant Death Syndrome prevention guidelines, babies are developing flat heads. 

Called positional plagiocephaly, a young infant’s head flattens when prolonged pressure is placed on one spot. Tricks to prevent positional plagiocephaly all encourage equal pressure over the entire head. Because babies’ heads are malleable, parents can prevent and treat the flatness. In fact, the flat shape begins to correct itself as babies spend less time lying down and more time sitting and crawling. Additionally, increased hair growth hides some of the flatness.

To prevent positional plagiocephaly, place your baby prone (belly down) frequently WHILE AWAKE, starting in the newborn period. This tummy time decreases pressure on the back of the head. Some babies are not fond of tummy time and will cry until they are back on their backs.  For those kids, check out our post on making tummy time more tolerable for your baby.

Encourage your baby to look to both sides while lying down. Too much time turned to one side will cause flattening on that side. Alternate how you place the baby in crib so that sometimes she turns to the right and other times she turns to the left to face into the room and away from the wall. If your baby seems to prefer looking only to the right or only to the left, place toys or bright objects toward the non-preferred side. If bottle feeding, switch off which arm you use to feed your baby, so that the baby sometimes turns to the right and sometimes to the left . If breastfeeding, start and end on the side that the baby tends to avoid. These actions will help prevent neck muscles from becoming too tight on one side and thus allow your baby to turn easily to both sides.

Some babies wear helmets to correct their abnormal head flattening. Neurosurgeons, who are head and brain specialists, and plastic surgeons prescribe these helmets for babies who have extreme flattening. Fortunately, the majority of babies with positional plagiocephaly do not need to wear helmets.

You also may have heard of babies who need corrective surgery for an abnormal head shape. This condition, called craniosynostosis, is rare. Pediatricians monitor the size and shape of the head , check the soft spot on the top of the head and for ridges on the skull at every check-up. A baby’s skull develops in pieces as a fetus, and these pieces eventually come together at predictable places called sutures.  If the pieces come together too early or the soft spot closes too soon, corrective surgery may be needed.

So, avoid head flatness by rotating your baby’s position frequently (think rotisserie chicken!) and provide plenty of “tummy time” when awake. Start when the baby first comes home.

If you are worried about your baby’s head shape, just head on over to your baby’s pediatrician and bring up your concern. It is unlikely that your concern will “fall flat.”

Julie Kardos, MD and Naline Lai, MD

©2012, rev. 2016 Two Peds in a Pod®

image_pdfimage_print
Share

Before the Zika virus: A look back at Rubella and microcephaly

photo credit: Laikipia Pixabay.com

photo credit: Laikipia Pixabay.com

The Zika virus in the news these days reminds us of another microcephaly-causing virus which scourged our world in the not-so-distant past. In the years right before the Two Peds doctors were born (late 1960s), the virus Rubella routinely swept through the United States and the rest of the world. The airborne germ Rubella, just like the mosquito-spread Zika virus, caused most people just a mild illness that they usually never even knew that they had. After they were sick, they became immune to the virus. But when pregnant women contracted Rubella early in pregnancy, their unborn children sometimes ended up with microcephaly.

Microcephaly is a condition where a small, underdeveloped, or abnormal brain leads to a small head at birth. Many children with microcephaly have significant mental disabilities.

So what happened to Rubella? It’s the R in the MMR vaccine. We give this vaccine to all children, first at 12-15 months, and again at 4-6 years of age. We vaccinate girls to protect their unborn fetuses when they are pregnant, and we also vaccinate boys. Although boys will not become pregnant, they can contract the disease and spread it to others who are pregnant. It is standard practice for obstetricians to test all of their pregnant patients for immunity to Rubella. If a woman is not immune, she is given the MMR vaccine after delivery to prevent coming down with Rubella during future pregnancies.

Because of the success of this safe vaccine, it is extremely rare to have child born with Congenital Rubella Syndrome and its accompanying problems. The syndrome  not only included the mental impairments associated with microcephaly but also was associated with blood disorders, heart defects, deafness, visual impairment, developmental delay, and seizures. In the United States where the vaccine rates are high enough, no cases have been reported since 2004. In the rest of the world, cases still occur in countries with limited access to vaccines against Rubella.  Approximately 100,000 cases of Rubella worldwide per year still occur according to the Centers for Disease Control.

Scientists are working on a vaccine against the Zika virus because, as is often the case, preventing a disease is often easier, less costly, and more successful than attempting to cure it. For a basic explanation of how vaccines work, please see our prior post on this topic. Trials for a vaccine for Zika may begin as early as summer 2017.

But if we look at history, Rubella was once a dreaded virus too. Now, with the widespread use of a vaccine, although still dreaded, the rates of Rubella have dropped dramatically.  Zika hopefully will not be far behind.

Naline Lai,  MD and Julie Kardos, MD

©2016 Two Peds in a Pod®,  updated April 2017

image_pdfimage_print
Share

Dressing children for cold weather

Dressing your children for cold weather, even your canine children

Dr. Kardos’s fourth child wears her coat in the snow without fuss.

There is snow on the ground, so every morning I ask my elementary school-aged son if he wears gloves and a hat at recess. Every morning I get back the same blank stare and the question, “Why?”

It’s an age-old battle between parents and kids. Parents insist the kids are underdressed and the kids insist they are overdressed. In fact, I remember in fourth grade many an embarrassing moment when my mother would suddenly appear with mittens at the bus stop. So how can parents decide how warmly to dress their children?

Infants are particularly poor at regulating their own temperatures. In general for cool weather, dress a baby in one more layer of clothing than you are comfortable wearing. Another good way to keep a newborn from losing too much heat is to keep the hat on for a couple of weeks. It’s not an old wives tale; people do lose a fair amount of heat through their heads.

However, beware of over-swaddling. Over-heating has been suggested as a factor in death from SIDS (Sudden Infant Death Syndrome). If your partner insists on keeping the house the temperature of a sauna and you are sweltering all year, then dress your baby in a simple onesie. Just as infants have difficulty regulating body temperature in the cold, they also have difficulty regulating their temperature in heat. In general, if you feel cold, your baby will feel colder. If you are warm, your baby will feel warmer than you do. There is an official indoor temperature recommendation for daycare centers: in cold weather, keep indoor temperatures to 68-75F.

Sleep always seems to bring out red cheeks and sweaty heads in toddlers. Are they too hot or cold? As you peek in on them after tucking them to bed, feel their hands and cheeks. Warm (but not flushed) cheeks mean they will be comfortable even if their hands are a bit cool.

For older kids, simply dress them the same way you dress yourself. Make sure areas prone to frostbite such as toes, ears and fingers stay warm. Quick tidbit: do not re-warm nearly frostbitten areas by massaging. The rubbing action causes more injury. Instead, place the area in warm water.

Sorry, you can’t use the rational, “Dress warmly or you will catch a cold.” Cold temperatures do not cause colds. Germs cause colds. However, there is one study on mice that suggests cooler noses allow the rhinovirus (a common cold germ) to grown more easily. Also, there is a phenomenon called nonallergic rhinitis which manifests itself as a drippy nose which can be set off by cold air. Likewise, inhaling cold air can set off coughing in kids with asthma. For more about the health benefits and hazards of cold weather for both kids and adults, check out this article from Harvard Health Publications.

Why it’s not “cool” to stay warm, I’ll never understand. At least for the older boys, parents don’t need to take into account the weather. The kids will wear hoodies whether it’s seven or seventy degrees outside.

Naline Lai, MD with Julie Kardos, MD
©2016 Two Peds in a Pod® revised 1/2019

(For a laugh: we love this tongue-in-cheek post about how kids dress for cold weather).

image_pdfimage_print
Share

Prevent rotten teeth

prevent rotten teeth like theseThis drives us crazy: Listed on many pediatric developmental milestone charts, there is the six month milestone, ” can hold their own bottle. ” Unfortunately, this is the last thing we want our patients to do. Babies who feed by holding their own bottle tend to suck for a longer period of time than when they are at the breast or when a parent holds the bottle. Prolonging the time any sweet substance, whether breast milk, cow’s milk, or watered down juice is in the mouth can produce cavities. Even in toothless babies, the sugar can seep through gums and rot the teeth producing cavities called “bottle rot” in the two front teeth. As shown above, sucking on a sippy cup constantly can also produce the characteristic damaging pattern and cause rotten teeth.

Sippy cups are like daytime bottles. In the “old days” if a child wanted a drink, the parent would give him a cup, he would take his drink, and then the cup would be put away so it would not spill. Sippy cups are easier to leave around for kids to grab when they need it. They are easy for kids to carry and graze from while playing. They don’t make a mess in the car. But because kids can nurse a sugar-containing drink all day, it becomes easy for a sweet drink to have constant contact with teeth, thus producing the problem you can see in our photo.

How to prevent rotten teeth:

  • Once they are toddlers, give your kids beverages at meal or snack times only. Let them drink and then put the cup away. Otherwise, forward to the future, and imagine your sippy-cup-toting toddler becoming the perpetually-drinking-coffee office coworker down the hall. We’re sure your coworker’s teeth are not pretty. The only exception to giving a beverage only at meal or snack times is the quick after dinner cup of milk when they are very young (toddlers). If your toddler drinks a cup of milk before bed, make sure he brushes his teeth before going to sleep. Brush-book-bed is a good routine to institute.
  • Limit juice. Whether 100%, or organic, or watered down, juice contains enough sugar to rot teeth over time. Dr. Kardos remembers a friend lamenting, “I bought only 100% juice for his sippy cup and had no idea it could hurt my son’s teeth like that!” Eventually, her friend’s son underwent a tooth repair under anesthesia.
  • Encourage good tooth brushing at least twice a day with fluoride-containing toothpaste, starting when your child gets his first tooth. Before that point, wipe out your baby’s gums with a wet gauze or wash cloth.
  • Schedule regular dental visits for your child starting around or soon after his first birthday. Going to the dentist is a vital part of preventing rotting teeth.
  • Ask your pediatrician or dentist if supplemental fluoride may be helpful.

Some final food for thought: snacks of pouch-pureed fruits and vegetables are increasing in popularity. We don’t think we need to wait for a scientific study to say that prolonged sucking on a packet of “healthy” fruit puree will probably result in the kind of teeth pictured above .

For more tips check out the American Academy of Pediatrics and the American Academy of Pediatric Dentistry.

Julie Kardos, MD and Naline Lai, MD

©2016 Two Peds in a Pod®

image_pdfimage_print
Share