We give thanks, 2016

Nearly seven years ago, on the swimming pool bleachers at the local Y, I happened to sit next to Lexi Logan. Above the echoing din of kids splashing, I discovered that although she was trained as a painter, Lexi was interested in branching out into photography. Coincidentally, Dr Kardos and I were interested in branching medicine out into a new media called the internet and were dismayed at the lack of publicly available photos to accompany our blog posts. Lexi and I intersected in the right place at the right time. Since that chance meeting, Lexi has generosity shared dozens of photos with Two Peds in a Pod.

The woman in the photo below, between your Two Peds (Dr. Kardos with the curly hair, Dr. Lai with the straight hair), is our photographer extraordinaire, Lexi Logan. Her work, which you can check out at www.lexilogan.com,  speaks for itself.  Local peeps may want to contact her to take their own family photos.

This Thanksgiving we say thanks to all those parents we’ve ever sat next to on bleachers. All the kid-related information we have learned, from navigating chorus uniforms, bus stop times, best teachers, fun summer camps, and even starting up blogs, has been invaluable.

In particular- thank you, Lexi!

We wish all of our readers a very healthy and happy Thanksgiving,

Dr. Naline  Lai with Dr. Julie Kardos

©2016 Two Peds in a Pod®

two-peds-and-lexi


Potty training 101: the nuts and bolts

teddy-bear-potty-trainingA shout out to Trinity Day School in Solebury, PA where we spoke with a group of parents yesterday about the pearls and pitfalls of potty training. Today we share some of what we discussed.

At Trinity day School

At Trinity day School

“Will it ever end?” many parents ask. Time moves in slow motion for parents teaching their kids to use the potty. For those trapped in a potty training time warp, take heart. It’s been seven years since we first released out podcast on potty training and we’re proud to report that the  parents who first listened to that podcast have moved onto new parenting challenges like helping with homework. For those in the midst of training, and those who are contemplating training, this post is for you.

Children master potty training typically between the ages of two and four years. Be patient, not everyone is “typical.”  More important than your child’s age is whether she shows she is developmentally ready to train. These signs include:

– is generally agreeable/ can follow directions.

– gets a funny expression before passing urine or poop, or runs and hides, then produces a wet or soiled diaper.

-asks to be changed/ pulls on her diaper when it becomes wet or soiled- remains dry during the day time for at least two hours (look for a dry diaper after nap time.)

-NOT because grandparents are pressuring you to start training their grandchild.

– NOT if the child is  constipated—the last thing you want to do is to teach withholding to a kid who already withholds.

-NOT if a newborn sibling has just joined the family. A new baby in the house is often a time of REGRESSION, not progression. However, if your toddler  begs to use the potty at this time, then by all means, allow him to try. 

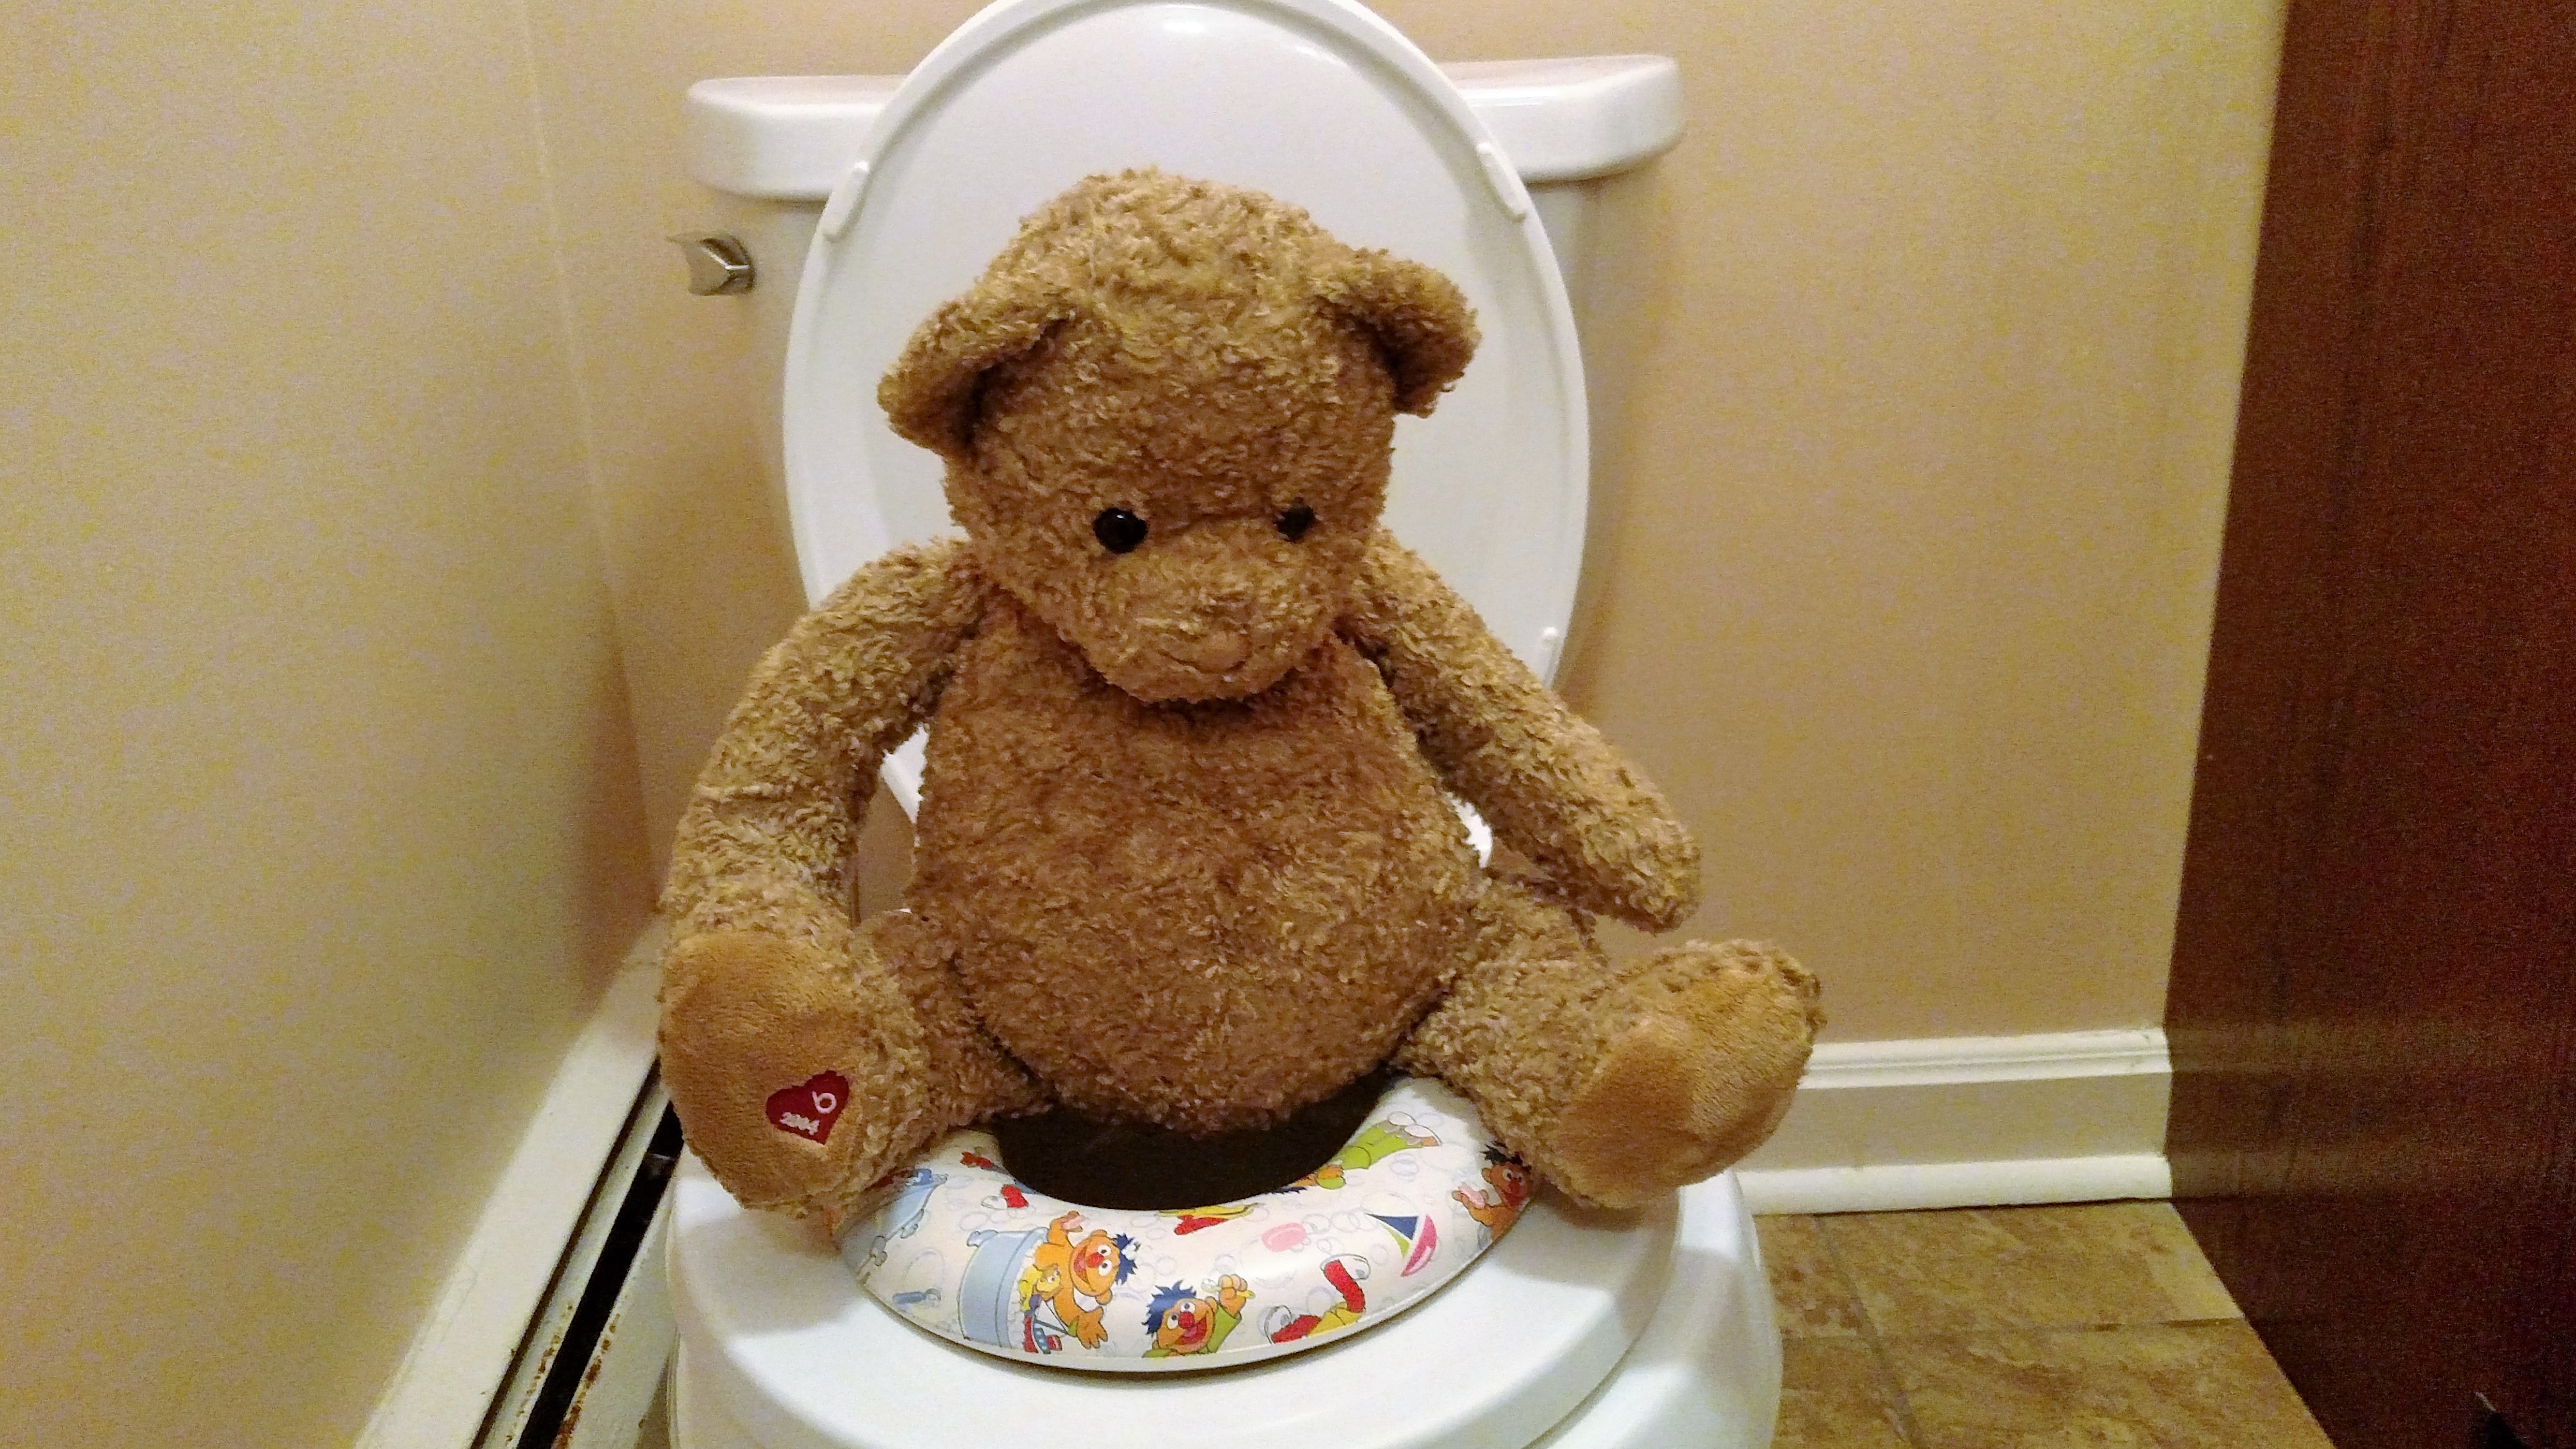
Make the potty a friendly place. Have a supply of books to occupy your child while she sits. Make sure her feet are secure on the floor if using a potty chair or on a stool if using the actual toilet. If using the real toilet for training, consider placing a potty training rim on the toilet seat to prevent your child from jack-knifing into the toilet. If your child is afraid of the bathroom, put the potty chair in the hall just OUTSIDE of the bathroom.

Have reasonable expectations based on age. A two year old’s attention span is two minutes. Never force your child to sit on the potty. If he doesn’t want to sit, then he isn’t ready to train.

Your can lead a horse to water… Reward your child for sitting on the potty, even if she does not “produce.” Reward by giving a high-five, verbal praise, or a small, cheap trinket such as a sticker. Do NOT promise your child a trip to Disney for potty training—otherwise, what will you do when she learns to ride a bike or tie her shoes? Plus, unless you are prepared to leave right away, the toddler/preschooler does not developmentally understand the concept of long term reward. Accept that she may simply enjoy sitting fully clothing on the potty while singing at the top of her lungs for a few weeks.

Let your child learn by imitation  At home, have an open door bathroom policy so she can imitate you and her older siblings. At school, she will imitate her potty-trained classmates.

Initially, kids rarely tell their parents  they “have to use the potty.” For these kids, schedule potty visits every 2-3 hours throughout the day. Do potty checks at key times such as first waking up, right before nap, and before bedtime. Be sure to spend extra time a half an hour after meals or after a warm bath. Both meals and warmth stimulate poop!

A child is potty trained when she can do the whole deal: use the potty, help wipe, help un-dress and re-dress, and wash hands.

If the child refuses to wash hands after using the potty, she is not trained. Ultimately, the goal is for her to gain independent  toileting skills.  However, she will need your supervision for a while.

Important note for parents of BOYS: First potty train your son to sit for ALL business. Teach him to gently press his penis downward so pee lands in the toilet and not all over the room. Once your son stands up to urinate, he may become so excited that he may never sit down again. Better to wait until he uses the potty consistently with few accidents before teaching him to stand up. Even after he begins to stands to pee, have him sit on the potty daily to allow him time to poop.

Don‘t be surprised if your child trains for pee before poop. In fact, many kids go through a phase when they ask for a diaper to poop in. After all, it’s frightening to see/feel a chunk of your body fall into an abyss.  Dump the poop from the diaper into the potty and practice waving bye-bye.

A note about night time and naps: Potty train for when your child is awake. Your child will spontaneously, without any training, stay dry at night and during naps. Some kids sleep more soundly than others and some kids are not genetically programmed to stay dry overnight until they are elementary school aged. For more information about bed-wetting please see our post on this topic.  No amount of daytime training will affect what happens during sleep. Moderate fluids right before bed and  continue putting on the diapers at night until you notice that the diapers are dry when your child wakes up. After a week of dry mornings, try your child in underwear overnight. Occasional accidents are normal for years after potty training, so you might want to put a water proof liner under your child’s sheets when first graduating to sleep underwear.

Disposable training pants: We like sticking to underwear while potty trainers are awake and diapers while asleep.  A reluctant trainer tends to find training pants just absorbent enough that he does not care if he is wet. However, the pants are not absorbent enough to prevent rashes from stool or urine. Plus they are more expensive than underwear AND diapers. Explain to your child  “sleep diapers” are perfectly acceptable until their “pee pee learns to wake them up.” Use the training pants when your child is older and is  mortified by the idea of a diaper or if your family is going on a long car ride and you don’t want to risk urine on a car seat.

Above all: avoid power struggles. If potty training causes tears, tantrums, or confusion then STOP TRAINING, put those diapers back on, and try again a few weeks later. 

After the training, keep an eye on how often he pees and poops. Older kids get “too busy” to go to the potty. Make sure he is in the habit of  emptying his bladder four to six times a day and having a soft bowel movement every day or every other day.

Ultimately… you just have to go with the flow. And remember, everything eventually comes out right in the end.

Julie Kardos, MD and Naline Lai, MD
©2016, 2013 Two Peds in a Pod®


How to transition to milk in a cup

photo by Lexi Logan

photo by Lexi Logan

While “drinks from a cup” is often listed as a developmental milestone for one-year-olds, it is a good idea to start teaching this skill BEFORE your child’s first birthday. Go ahead and introduce a cup when you baby is around six months old.

Here’s why six months is a great time to start a cup:

  • Six-month-olds are starting to sit propped and even unsupported
  • Six-month-olds can bring their hands together and pull most objects into their mouths – this is why baby proofing is so important starting at this age as well!
  • Six-months-olds are usually not afraid or wary of new things, new experiences, or new people. As an example, when I walk into the exam room and start examining a 6-month-old baby, he usually smiles and “talks” to me. When I hand him 2 wooden tongue depressors to play with, he reaches for them eagerly and puts them into his mouth as soon as he grabs them. In contrast, a 9-month-old or one-year-old will often look back at his dad  when I enter the room,  he might cry when I go to examine him, and may eyeball the wooden tongue depressors suspiciously.
  • One-year-olds are much more willful and oppositional than 6-month-olds and so may balk at a new way of drinking.

“You mean a “sippy cup, right?”

We have an entire post devoted to sippy cups but the short of it is that even babies as young as 6 months can start learning to drink out of open cups. Parents have told me that their 6-month-old will pull their mom’s water bottle to his mouth and drink from it.

The origin of the non-spill sippy cup:

According to this article in the New York Times , mechanical engineer and dad Richard Belanger first developed his own non-spillable cup because he was tired of always cleaning up his toddler’s spills.  In other words, he developed the cups for parents with an aversion to mess, not as a “stepping stone” for kids learning to drink out of a cup. His non-spill cups were specifically for kids who already drank out of open cups but often spilled them. He eventually pitched his prototype to Playtex, and the rest is history: non-spillable sippy cups are now ingrained into toddler culture.

So, when parents of my patients lament, “My child throws the sippy cup away! He won’t suck from it!” I smile and answer, ok, take the vacuum seal or valve out or skip the sippy cup and  just give a regular open cup.

WHAT should you put in the cup?

Water is a great choice. It is healthy and does not stain so is easy to clean when your new cup-user spills it.

You can put formula or breastmilk in the cup if you want, but don’t worry if your baby won’t drink it. Remember, you are not replacing bottles or nursing yet, you are simply adding a cup.

After your child turns one year, you can put whole or two-percent cow’s milk (reduced- fat milk) in the cup. No need for toddler formulas. Your pediatrician will guide you as whether to start with whole or the two-percent.

How much milk do kids need in their cups?

Remember that once your child weans from breast milk or formula, she no longer receives a lot of iron through cow’s milk. In fact, the calcium in milk hinders iron absorption from food, so be sure to cap your child at 24 ounces of milk per day and give  iron rich foods.

Most juice, even 100% juice, has the same sugar content as soda (such as Coke or Sprite), so juice is not a great choice of beverage for kids. Children should eat fruit but most do not need to drink juice.

Do I have to mix cow’s milk in with the formula or breast milk to “get my child used to it?”

Not at all! Think about how you fed your baby solid foods.  You didn’t  have to, for example, start with cereal and then mix every other food into the cereal. Just start cow’s milk in a cup alongside your last supply of formula in a bottle or at the same time you are still giving breast milk. For social reasons and to make it easier for yourself later, offer “big kid milk” in cups and “baby milk” in bottles. Then when you stop giving formula, you won’t need to continue to give (and wash- ugh!) bottles anymore!

One trendy question we hear these days is: Can I give raw milk in the cup?

The answer is: NO.

Raw milk contains many bacteria, such as salmonella, Listeria, and E.coli.  The reason we pasteurize milk is to get the bacterial count down. Out of 121 dairy-related outbreaks in the US reported between 1993 and 2006, 73 (60 percent) were linked to raw dairy, despite the fact that only about 3 percent of the dairy products consumed in the U.S. was unpasteurized. These statistics prompted the American Academy of Pediatrics to issue a statement in 2013 recommending against raw milk.

If your  child won’t drink cow’s milk, that’s ok too. Cow’s milk is a convenient, but not a necessary, source of protein, fat, vitamin D, and calcium, all of which are found in other foods.

If your child is allergic to dairy or is lactose intolerant, you can offer almond milk, soy milk, or even no milk.

After one year of age, it’s fine if water is the only fluid your child drinks. He can get all of his nutrition from food. Liquid intake is more for hydration than for sustenance.

A word about vitamin D: Even though cow’s milk is fortified with vitamin D, continue to provide a vitamin D supplement. The recommended daily allowance of vitamin D intake starting at one year of age is 600 IU a day. Since most toddler/child vitamins contain 400 IU per tablet/gummy, most kids will take in the recommended daily allowance of 600 IU a day if they drink some milk and take any of the over-the counter chewable vitamins. If your child does not drink any milk or you prefer not to give a supplement, 600 IU a day can be achieved through yogurt or cheese that is vitamin D fortified as well as vitamin D containing foods such as salmon and shiitake mushrooms ( I know, I know… shiitake mushrooms are not usually a toddler favorite). 

Beware of Grazing: Just as a “dieter’s trick” is to drink eight ounces of water prior to meals to curb the appetite, too much fluid = less appetite for solids. Grazing in the day or at night  hinders picky eaters from eating. Additionally, grazing milk promotes dental caries (cavities) because milk sugar constantly bathes the teeth. Even if your child initially drinks a bedtime cup of milk, remember to always brush his teeth afterwards and to eventually stop offering milk before bed. Your goal is to offer the cup with meals or snacks. Your child does not need a cup in between.

We hope this post quenched your thirst for knowledge about transitioning to a cup!

Julie Kardos, MD and Naline Lai, MD

©2016 Two Peds in a Pod®


Finger Foods for Your Famished Toddler

Time to start finger foods!Got a baby starting on finger foods? Good news:  You don’t have to go broke over buying toddler Puffs®.

Babies and young toddlers don’t have a lot of teeth. In fact, a full set of teeth does not come in until around two years of age. In the meantime, to help your new eater avoid choking, cut up food into tiny pieces. Now, sawing at food with a knife is not easy. Meet your new friend: the kitchen shears! For perfect finger foods, use shears to snip food into ideal toddler bite-sized pieces.

Cut table food into bite-sized pieces smaller than a grape, or approximately Cheerio® sized, and place on a clean surface, such as the high chair tray. Plates are not necessary and often end up on the floor. Go ahead and give your toddler a fork but don’t expect him to use it- most toddlers are eighteen months before they can master a fork or spoon. Always be present when he is eating in case he starts to choke. Toddlers tend to put a handful of food in their mouth at one time, so teach your child to eat pieces of food “one at a time.”

Forget the toddler-food aisle, just grab your shears and cut away. Below are finger foods to help you get started. These foods are appropriate for babies who are able to finger-feed, starting anywhere between 7 to 9 months of age, even without teeth:

canned mandarin oranges

fruit cocktail (in juice, not syrup)

bananas

diced peaches

diced pears
diced mellon
diced berries, cut blueberries in half at first

diced cooked apples

raw tomato pieces

avocado

beef stew

liverwurst cut into small pieces

diced cooked meat

Cooked, diced chicken

Diced cooked fish (careful to discard any bones) click here for U.S. Food and Drug Administration recommendations 

tofu (extra-firm is easiest to cut)

black beans, cooked or canned (rinse off the salty sauce they come in)

egg salad or hard-boiled egg pieces

bits of scrambled egg

soft cheese- such as American or Munster

vegetable soup (just scoop out the veggies and give them to your child. You can put the broth into a cup for him to drink)

diced cooked veggies such as peas, carrots, corn, broccoli, zucchini, etc.

diced cucumbers

cooked diced squash

cooked diced potatoes, sweet potatoes, or yams

rice (rinse the rice grains in cold water prior to cooking to wash away trace amounts of arsenic that can be found in rice, couscous, quinoa

noodles

pierogies

mini ravioli

macaroni and cheese

waffles

pancakes

french toast

crackers with cream cheese

toast with jelly

toast with nut-butter (soy, peanut, almond, sunflower, etc.)

stuffing

Cheerios®

If your baby still likes his cereal, you can continue to offer it (We both still like oatmeal- it’s not just for babies!). Just be sure to vary the types of grain that you offer your baby.

Bon appetite!

Naline Lai, MD and Julie Kardos, MD

©2016 Two Peds in a Pod®, modified 3/2019


Time out from summer for an important flu update

Time out from summer for a flu update

Time out from summer for a flu update

We interrupt your summer to bring you a Flu vaccine reminder and update.

Although flu (influenza) may be far from your minds, as we enter hot July, pediatricians are already ordering flu vaccines in preparation for Back to School. When the time comes, parents should add “schedule flu vaccine” to their back-to-school list as flu vaccines will arrive in offices as early as late August. Even immunizations given in August will last the entire winter season.

For fans of the nasal spray version of the flu vaccine—bad news. Turns out, data from the past 3 years shows the nasal spray is not nearly as effective as the injectable version. The American Academy of Pediatrics  and the American Center for Immunization Practices both recommend giving only the injectable version of flu prevention for protection against influenza.

Nonetheless, for the inconvenience of a pinch, the vaccine is still worthwhile. A total of 77 children died from flu in the US during the 2015-2016 flu season and many more children were hospitalized with flu related complications such as pneumonia and dehydration. Flu is highly contagious and spreads rapidly within households and schools, including daycare centers. People are contagious from flu one day prior to showing any symptoms of flu.

While most people who become sick with the flu survive, they will tell you it is a tough week. In addition to having a high fever that can last 5-7 days, a hacking cough, and runny nose, those stricken will tell you that every part of their bodies hurt. Even the movement of their eyes can hurt. In addition to the physical effects, our high school and college level patients are particularly distraught about the amount of schoolwork they miss while recovering from the flu.

An ounce of prevention is worth a pound of cure, which is why the flu vaccine is so terrific. There is no “cure” for the flu- you have to let your body fight it out. Unfortunately antiviral medications such as oseltamivir at best shorten the duration of flu symptoms by about one day. Flu vaccines work by jump starting your body’s natural immune system to produce disease fighting cells called antibodies. Vaccines are given yearly because flu virus strains  often morph between flu seasons.

For more Two Peds In a Pod posts about flu and about vaccines in general: How to tell the difference between the common cold and the flu, Fact or Fiction: a flu vaccine quiz, Getting back to basics: how vaccines work.

OK, now back to your summer fun!

Julie Kardos, MD and Naline Lai, MD

©2016 Two Peds in a Pod®


Bye-bye binkie: weaning the pacifier

weaning binkie

This very dusty binkie emerged from my daughter’s room just in time for her 16 th birthday. Yes, it’s a 16 year old binkie. Seeing the pacifier was like greeting an old friend. Any family who has a binkie addict knows how the binkie is a source of their child’s comfort and joy, and also how difficult it can be to wean. But take heart, someday your child’s binkie will lie forgotten and dusty. –Dr. Lai

Whether you love or hate the pacifier, at some point, to avoid the possibility of dental and speech articulation impairment, your child needs to wean. Besides, it’s nice to see your child’s entire face. You can start restricting your child’s use of the pacifier to crib/bed around two years old, and then entirely somewhere in the three year old year. Your child’s dependence on sucking for self-comfort decreases and he begins to want to dissociate himself from being a “baby.”*

Here are some ways you can encourage your child to do without his/her beloved pacifier:

  • Throw the pacifier across the room and entice your child to say with you, “Yucky, binkies are for babies.”
  • Restrict pacifiers to specific places such as your home, crib, or bed.
  • Take a  “Binkie finding hunt” with your child and gather all the binkies into a basket. Have the binkie fairy come overnight, take the basket, and leave a present in the morning. Alternatively, one set of parents told me that they told their child that they were gathering binkies for babies who didn’t have any.
  • If giving your child a pacifier is part of your bedtime routine, start to introduce something else such as a special blanket or stuffed animal.
  • Sometimes as parents, we are the ones who have to be weaned. When your child is upset, do not automatically pop a binkie into your child’s mouth. Seek other ways to help your child calm himself. Hand him a book, or sit down and read with him. Refrain from handing your child your cell phone or ipad to watch a video- it can be harder to wean this habit!
  • Vow to yourself not to buy new pacifiers at the grocery store. Gradually the pacifiers left in the house will disappear or the mold on them will prompt you to throw them away.
  • Cut a small hole in the tip of the nipple- the binkie will not “be the same.” Tell your child that the binkie is broken and throw it away.
  • Vacations disrupt schedules. Therefore, sometimes in an unfamiliar bed, children wean habits. Conveniently forget the binkie while going on vacation and do not introduce it on return home.
  • By age three, most kids appreciate the value of a good bribe. Offer them a reward for going a whole week (or at least 3 days) without the binkie. One night doesn’t count because often the second night is more difficult for the child than the first when he is giving up the binkie. Once you have gone a week, the child will have no desire to go back. Just make sure you have disposed of every last binkie in your home so they will not have reminders of the “good old days.”

And now, a poem by Dr. Lai:

Ode to the Binkie

Bed time when toddlers start to shout,

It is you, dear binkie, who knocks them out.

Those thumb suckers look so snide,

But haven’t been without you on a long car ride.

None in the diaper bag, none in the crib?

Take one from our infant sib.

If you touch the ground, I’ll give you a quick blow,

Back into the mouth you’ll just go.

But now my child can run and jump with both feet off the ground,

Two to three word sentences she can sound.

If old enough to politely ask for you,

Then old enough to make permanent teeth go askew.

Oh dear binkie, you once had your place,

Now let’s take the cork from the face.

Once you were our beloved binkie,

But right now… you are just stinky.

*NOTE: we have different suggestions for thumb suckers. Clearly we can’t throw a thumb across the room and say “Thumbs are for babies!” To be very brief: aim for stopping thumb sucking by the time that permanent teeth grow in, by around age 6 or so. If you pluck it out right after your child falls asleep, often it stays out for most of the night.

Naline Lai, MD with Julie Kardos, MD

©2010, 2016 Two Peds in a Pod®


Baby and toddler nails: Tricks for managing your munchkin’s mani-pedi

taking care of baby nails

The prom preparation aftermath

It’s not your imagination: baby and toddler nails are funky and warped. Now add the fact that babies and toddlers wiggle and squirm, and taking care of your young child’s nails will appear to be a daunting task.

Even soft newborn finger nails leave significant scratches on newborn faces. Newborns need their first “manicure” within days of birth. Although the nails are long enough to scratch, most of the nail is adherent to underlying skin. A nail clipper can not get underneath the edge of the nail easily. We recommend using an emery board or nail file for the first few weeks of nail trimming. File from the bottom up, not just across the nail, in order to shorten and dull the nail.

Babies gain weight rapidly in the first three months at a rate of about one ounce per day, and they grow in length at a rate of about an inch per month. Their finger nails grow rapidly as well and therefore need trims as often as two or three times a  week. Toe nails grow quickly as well but because they do not cause self-injury, infants seem to be okay with less frequent toe nail trimming.

Once the nails are easier to grab, you can advance to using nails scissors or clippers. Dr. Kardos used to hold her babies in a nearly sitting position on her lap facing outward. Once you have a good hold, gently press the skin down away from the nails and then clip or cut carefully.

Unfortunately, no matter how careful you are, many well-intentioned parents end up cutting their child’s skin at some point. Both Dr. Kardos and Dr. Lai have nicked their kids accidentaly. Dr. Kardos recalls snipping a bit of skin from one of her twins when he was a few months old. Picture a tiny benign paper-cut that seems to cause a disproportunate amount of bleeding. He wasn’t even all that upset, but the guilt! If you accidentally cut your child, wash the cut with soap and running water to prevent infection and apply pressure for a few minutes with a clean wash cloth to stop the bleeding. Avoid band-aids: they are a choking hazard in babies who spend most of their waking moments with their fingers in their mouths. Thankfully, rapidly growing  kids heal wounds rapidly.

While Dr. Lai gave most of her kids manicures while they were sleeping, Dr. Kardos trimmed her kids’ nails while awake to get them used to the feeling of a “home manicure.” She likes to think this practice avoided some later toddler meltdowns over nail trimming. However, as she found out in one of her three kids, some kids are just adverse to nail trimming, or have sensitive, ticklish feet and balk at trims. Yet, trim we must! Clip an uncooperative toddler’s nails about 10-20 minutes after she has fallen asleep- this, or wait until you have another adult at home with you. Have your helper hold onto your child’s hand or foot while distracting the toddler with singing, book reading, or watching a soothing video together. Then you can (quickly) trim nails.

However, even in infants, the sides of big toe nails grow into the skin. Luckily the nails are very soft, and with some soaking in warm water, you can pull the skin away from the nail and cut the nail to avoid having them dig in and result in infection, or paronychia.

While it’s tempting to complete your child’s mani-pedi with a coat of nail polish, keep in mind that a young children spend a lot of time with their hands, and their toes, in their mouths.  We’ve seen kids as old as ten years bite on their toe nails. Unfortunately, the nail polish on your bureau may contain toxic hydrocarbons such as toluene and formaldehyde. Even non-toxic nail polishes will still contain dyes, and just because a manufacturer uses the term non-toxic, it doesn’t necessarily mean a product is absolutely harmless. There are no specific standards for the use of the term non-toxic.  Bottom line, the only route that avoids any chemicals is not to apply any polish in the first place. (If you are wondering about any cosmetic, the California department of public health keeps a database of cosmetics with ” ingredients known or suspected to cause cancer, birth defects, or other reproductive harm.” )

Who ever thought parental obligations would include cutting someone else’s finger and toe nails? If you haven’t perfected the process yet, take heart.  You’ll have plenty of practice over the years, and if you are lucky, you’ll get a chance like Dr. Lai did last weekend to help prep nails for the prom.

Julie Kardos, MD and Naline Lai, MD

© 2010, rev 2016 Two Peds in a Pod®


Pretty earrings- but what you see in the back will surprise you

We see this a couple times a year… an earring which looks fine when viewed from the front…

earring


…is actually embedded when viewed from the back. When you flip up this child’s ear lobe, you will notice how the skin has nearly completely engulfed the earring back. Young children heal well and the skin in the back of an ear can grow over the back of an earring fairly easily. So, change earrings often and “watch their backs.” It’s not enough just to spin the earrings around from the front.

embedded earring back


Naline Lai, MD and Julie Kardos, MD

© 2016 Two Peds in a Pod®


Mom “nose” best: Happy Mother’s Day 2016

elephant nose

This Mother’s Day, we honor Dr. Kardos’s mom, who passed earlier this year.

Dr. Kardos and I had been planning a post on nasal congestion in kids, but because we couldn’t have said it any better, we share a poem that Dr. Kardos’s mom wrote on this topic.

–Drs. Lai and Kardos


Runny Noses


My grandsons seem always to have runny noses;

They drip from their noses and land on their toeses;

One kid especially, his name is Aaron,

Will hug you so tight that what’s runnin’ you’re sharin’.


Alex will wipe with the back of his hand;

His runs in the house, on the beach, on the sand.

Jacob is older and he’ll use a tissue,

So his runny nose is not much of an issue.


In case they have colds, I hand each one a sweater,

But wearing a sweater does not make things better.

Allergic to dust? That’s the answer I’m seeking;

But while I keep dusting, their noses keep leaking.


They eat well and sleep well and play hard all day

In spite of their dripping that won’t go away.

So I’ve come to conclude, and I’m happy to say

That the noses of kids prob’ly just come that way.


by Felice Kardos (1943-2016)


The best sunscreen: questions answered

sunburn

An inadvertent sunburn tattoo

I was greatly relieved recently when my teen arrived back from a music department trip to Disney without a sunburn. I had pictured a bright red cherry tomato coming off the plane. For those of us stuck in the middle of an East Coast perpetual rain cloud, it’s hard to believe that anyone outside of the South needs to worry about sunscreen. But soon enough, you will be scratching your head in a pharmacy aisle asking yourselves these questions:

What is SPF?

  • SPF stands for Sun Protection Factor. SPF gives you an idea of how long it may take you to burn. SPF of 15 means you will take 15 times longer to burn without sunscreen. If you would burn after one minute in the sun, that’s only 15 minutes of protection!
  • The American Academy of Pediatrics recommends applying a minimum of SPF 15 to children, while the American Academy of Dermatology recommends a minimum of SPF 30. We both apply sunscreen with SPF 30 to our own kids (mom hint: the high SPF sunscreens tend to be watery).
  • Apply all sunscreen liberally and often– at least every two hours. More important than the SPF is how often you reapply the sunscreen. All sunscreen will slide off of a sweaty, wet kid. Even if the label says “waterproof,” reapply after swimming.
  • Watch out for sunlight reflecting off water as well as sunburning on cool days. One pediatrician mom I know was aghast at seeing signs posted at her kid’s school reminding parents to apply sun screen “because it will be in the 80’s.” Kids burn on 60 degree days too. Lower temperatures do not necessarily mean less UV light.

Why does the bottle of sunscreen say to “ask the doctor” about applying sunscreen to babies under 6 months of age?

  • Sunscreens were not safety-tested in babies younger than 6 months of age, so the old advice was not to use sunscreen under this age. The latest American Academy of Pediatrics recommendation is that it is more prudent to avoid sunburn in this young age group than to worry about possible problems from sunscreen. While shade and clothing are the best defenses against sun damage, you can also use sunscreen on exposed body areas.
  • Clothing helps to block out sunlight. In general, tighter weaves protect better than loose weaves. Expensive “sun-protective clothing” is not always better— a study from 2014 suggests regular clothing may be as protective.
  • Hats help prevent burns as well.
  • Remember that babies burn more easily than older kids.

Which brand of sunscreen is best for babies and kids?

  • Although clothing and shade block harmful rays the best, no one brand of sunscreen is better for children than another. We both tell our patients to apply a “test patch” the size of a quarter to an arm or leg of your baby and wait a few hours. If no rash appears, then use the sunscreen on whatever body parts you can’t keep covered by clothing. Look for UVA and UVB protection. More expensive does not always mean “better” and SPF above 50, according to the American Academy of Dermatology, has not been proven to be more effective than 50.

What do we know about the ingredients in sunscreen such as oxybenzone? In the United States sunscreen ingredients are considered medications and are regulated by the FDA. Oxybenzone is one of the oldest broad-spectrum (UVA and UVB) sunscreens, and was approved by the FDA in 1978. Oxybenzone’s main side effect is that it can cause allergic reactions of the skin. Recently, some people question whether oxybenzone can be a hormone disrupter and have questioned the use of oxybenzone. At this point, no hormonal disturbances have been clearly found in humans and the American Academy of Dermatology continues to support the use of oxybenzone.

Sunscreens made with zinc oxide and titanium dioxide (the white stuff on a lifeguard’s nose) have not garnered any questions nor sparked any debate about safety. Interestingly, zinc oxide is not only an effective sunscreen but also you will recognize it as the main ingredient in many newborn diaper rash creams.

Any info about the popular sprays? For spray formulations of any type of sunscreen, many doctors are concerned that any aerosolized oily substance will irritate the lungs and are looking into long term effects now. Avoid spraying sun screen near a child’s head to avoid inhalation. Also with the spray, some dermatologists worry that people might not be as thorough when they apply a spray as when they apply a cream.

Can I use last year’s sunscreen? Most sunscreens have expiration dates, as long as your bottle hasn’t expired, then it should be effective. In general, sunscreens are designed to last about three years before they expire.

Remember when we used to call sunscreen lotion “suntan lotion,” and when tolerating red, blistering shoulders was considered a small price to pay for a tan? Live and learn.

Naline Lai, MD and Julie Kardos
Two Peds in a Pod® rev ©2016 , 2015